Reports Window
In XFMEA/RCM++, the Reports window makes it easy to build report documents that include the predefined report forms, custom report forms and/or custom queries that will be most effective to present your analyses.
You can save generated reports with the project, which enables all users to view/print the same report documents. In addition, if your organization chooses to implement an SEP web portal for an enterprise database, these reports are also published to the portal (in Word, Excel, or PDF format), where they can be accessed from any web-enabled device.
To open the Reports window, choose Home > Reporting > Reports or System Hierarchy > Tools > Reporting > Reports.
![]()
Select Items
In the Select Items area, specify the items from the system hierarchy that will be included in the report. You can generate a report that contains data from a single analysis or from multiple analyses together. There are several shortcuts that you can use when selecting/clearing multiple items:
- Use the check box in the area header to select or clear all items in the area.
- Right-click an item and use the Select/Clear all items in node commands.
- New in Version 2020, right-click an item and choose Custom Selection to open the Custom Selection window. In this window, you can choose to select all items at a specified level of the system hierarchy. In addition, you can include or exclude the items below the specified level and can choose to include items only in the current system or, if there are multiple systems in the system hierarchy, to include items from all systems.
Tip: If the Part Number, Reference Number and/or FMEA Document Number columns are displayed in the system hierarchy, these columns will also be displayed in the Select Items area in this window.
Selected Report Forms
The Available Reports area displays all of the available report forms that are not yet selected. This list includes the standard report forms that are shipped with the software, as well as any custom report templates and custom queries that you have created.
The Selected Reports area displays the forms that have been selected for inclusion in the generated report, in the order in which they will appear.
You can double-click a form or use the Include (>, >>) or Exclude (<, <<) icons to move the form between the areas.
Drag and drop the selected forms into the desired position or use the Up/Down icons.
When applicable, you can use the Sort By and Ascending columns to specify how tabular report forms will be sorted. For example, you can generate a Causes report that sorts by Initial RPN in ascending order.

Templates Manager
If you want to create or edit any of the custom report templates, click Manage > Templates Manager in the ribbon.
![]()
In a secure database, this option is only available for users with the "Manage profiles and templates in XFMEA/RCM++" permission.
Report Customization/Settings
If you want to customize any of the report settings (e.g., font, paper size, add a logo, etc.), click Manage > Settings to open the Report Customization/Settings window.
![]()
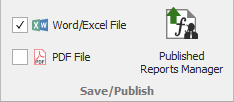
Save/Publish
If you want to save the generated report with the project (and also publish to the SEP web portal if applicable), select the desired output types on the ribbon.
To see the reports that have already been saved/published, click Save/Publish > Published Reports Manager.
Generate Report
Before generating the report, make sure the desired output type is selected in the ribbon (Excel Spreadsheet or Word Document) and then click Generate Report.
![]()
Tips
- If you have set your computer to use large fonts, you will need to set your screen display to at least 1152x864 to display correctly. If you have set your computer to use small fonts, you will need to set your screen display to 600x800.
- If you have enable the "Check spelling as you type" and "Check grammar as you type" options in Microsoft Word and you have a very large number of spelling/grammar issues in your data set, then Microsoft Word may stop responding during report generation, resulting in a blank document and possibly error messages such as "RPC Server Unavailable." If this occurs, you can temporarily disable these options in Word and regenerate the report.
- The regional settings for Windows and Microsoft Office (Word and/or Excel) must be compatible when generating reports in the software.
- The number of forms in your report cannot exceed the maximum supported by Microsoft Excel. Generated reports will include as many forms as possible up to the limit, which will vary depending on the version of Excel that you are using, and will omit the rest.