Planning Your Security Approach
In secure databases, there are two basic factors that determine what a typical user can see and do in the database: the security group(s) that the user account belongs to and the public/reference project security settings.
This topic discusses two general approaches you can use to configure the security groups and project security settings to fit your organization’s specific needs:
- Same permissions for all public/reference projects
- Different permissions for different public/reference projects
Tip: In addition to these considerations, it is also important to note the following: a) Users with the applicable "manage all projects" permissions (in any of the security groups that they belong to) will always have full project-level permissions for all public or reference projects in the database; b) The project owner will always have full project-level permissions within that particular project; and c) The item permissions can be used to further limit access to specific items within a project (e.g., folios, diagrams, system hierarchy items, etc.).
Same Permissions for All Public/Reference Projects
If you want each user to have the same set of permissions for all public/reference projects in the database (e.g., Jane Engineer has read-write access to all projects, Bill User has read-only access to all projects, and so on), follow these steps:
- User Accounts and Security
Groups: Assign each user account to an appropriate
security group.
This can be one of the four security groups that are created
by default in each new ReliaSoft database — Admin, Power,
User (Read/Write) or View (Read-Only) — or you can configure
new or existing security groups to meet your particular needs.
Select or clear the Allow access to projects with database-level security check box. If some of the projects in the database will continue to use database-level security, this allows you to specify whether each user will be able to access those projects.- If the option is selected (default), the user will be able to access any public/reference project that is set to use database-level security, with the combined permissions from any of the assigned security groups.
- If the option is cleared, the user will only be able to access a project if it is specifically assigned to a security group that he/she belongs to, or if the user account is specifically assigned to the project.
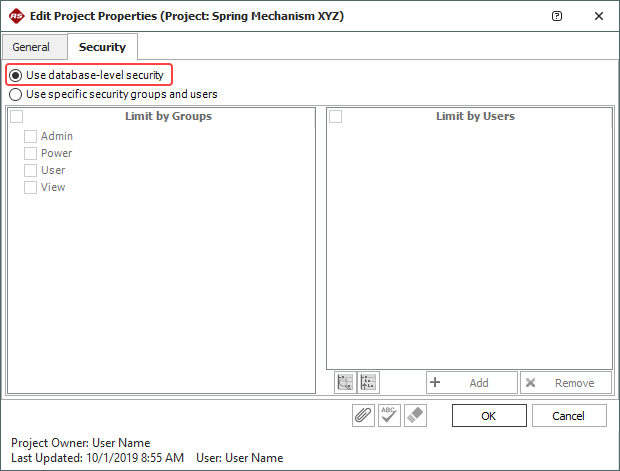
- Project Security: Accept the default option on the Security tab of the Project Properties for all public and reference projects (Project > Security > Project Security). Note that if a user belongs to more than one security group (and the Allow access to projects with database-level security check box is selected for his/her user account), that user will have the combined permissions of those groups in any project that is set to database-level security.
Different Permissions for Different Public/Reference Projects
If you want the same user to have different permissions for different public/reference projects (e.g., Jane Engineer has read-write access to all of Department A’s projects, but she has read-only access to other projects), follow these steps:
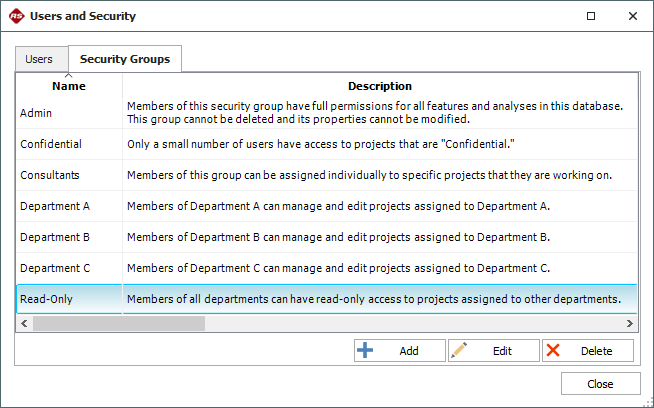
- Security Groups:
Create a security group for each distinct type of access that
users might need in any particular public/reference project.
Here’s a simple example:
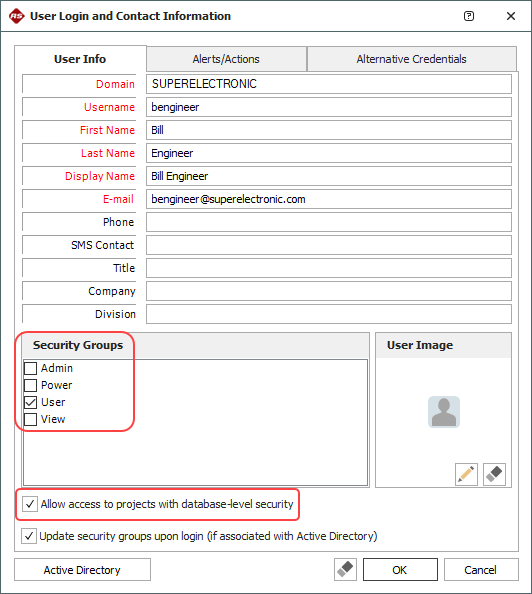
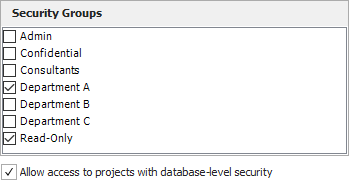
- User Accounts: Assign the appropriate security group(s) to each user account. For the example shown below, the user will have read/write permissions in projects that are assigned to "Department A," and read-only access in projects that are assigned to "Read-Only."
- If the option is selected (default), the user will be able to access any public/reference project that is set to use database-level security, with the combined permissions from any of the assigned security groups.
- If the option is cleared, the user will only be able to access a project if it is specifically assigned to a security group that he/she belongs to, or if the user account is specifically assigned to the project.
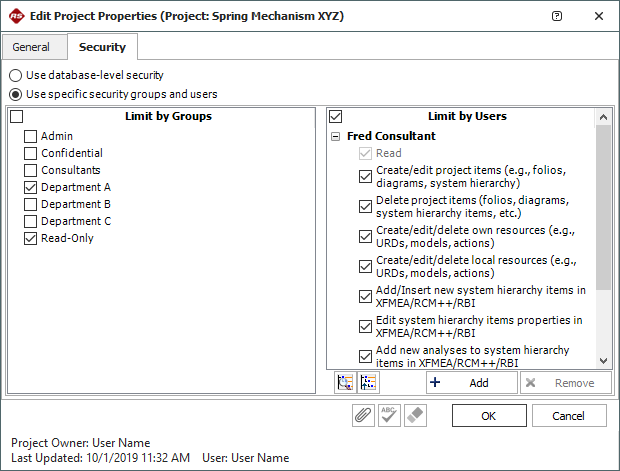
- Project Security:
Assign the appropriate security group(s) and/or specific user(s)
for every public/reference project in the database.
- When you assign a security group, every user who belongs to that group will be able to access the project with the permissions that are specified in the group.
- When you assign a specific user, the combined permissions from all of the security groups that the user belongs to will be displayed. Use the check boxes to select which of those permissions will be in effect for that user in this particular project.
- For the example shown below, users from Department A will have read/write access (because they belong to the "Department A" security group), users from Departments B and C will have read-only access (because they belong to the "Read-Only" security group) and Fred Consultant will have read/write access (because he belongs to the "Consultants" security group and has been specifically assigned to have those permissions in this project).
If some of the projects in the database will continue to use database-level security, the Allow access to projects with database-level security check box gives you the option to decide whether each user will be able to access those projects.