Prepare to Store and Use Files
Create a Folder for Storing Uploaded Files
You can configure the website’s Attachment window to store uploaded files on the web server (rather than in the database). If you plan to do this, you must prepare the folder where the files will be stored.
- Option 1: Create the folder directly within the website’s IIS folder (e.g., C:\inetpub\wwwroot\XFRACAS\uploads).
- Option 2: Create the folder in another location on the web server (e.g., D:\storage\xfracas) and then create a virtual directory within IIS.
Create a Virtual Directory
To create the virtual directory for Option 2, do the following in the Connections pane of the IIS Manager:
- Click Application Pools and either add a new pool or modify the default pool. Do not modify the “XFRACAS” application pool.
- Leave the identity as ApplicationPoolIdentity.
- Set the managed pipeline mode to Classic.
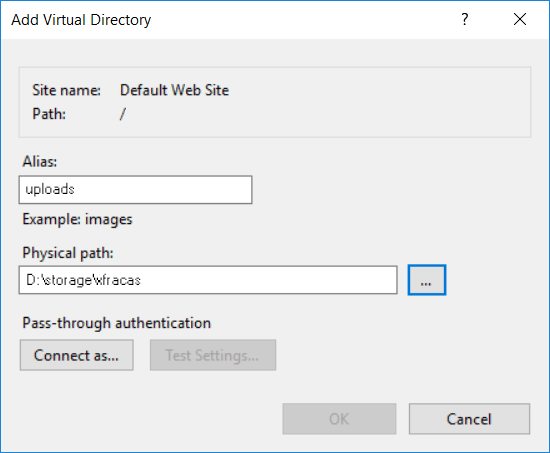
- Right-click the Default Web Site node and choose Add Virtual Directory. This must be under the default web site node; do not create the virtual directory within the XFRACAS website.
- Set the directory alias (e.g., “uploads” or “attachments”).
- Specify the physical path to the location where the files will be stored.
- Click the virtual directory and double-click Authentication. Make sure Forms Authentication is disabled.
- Right-click the virtual directory and choose Convert to Application. Select the appropriate application pool and click OK.
Test the Configuration
To test, you will need to set the appropriate preferences via the XFRACAS website (see Preferences), open a record that allows attachments (e.g., incident), upload a file and test the download.
For example, if you created an actual folder called “uploads” within the XFRACAS website, you would use:

Alternatively, if you created a virtual folder called “uploads” that stores files in another location on the web server (e.g., D:\storage\xfracas), you would use:

Prepare to Use *.XLSX for Data Import
XFRACAS provides the option to use Excel templates (*.xlsx) to import some types of data, as an alternative to XML. To configure the web server to support this functionality, you must install a 64-bit version of Microsoft Office (2013 or newer) on the web server.